
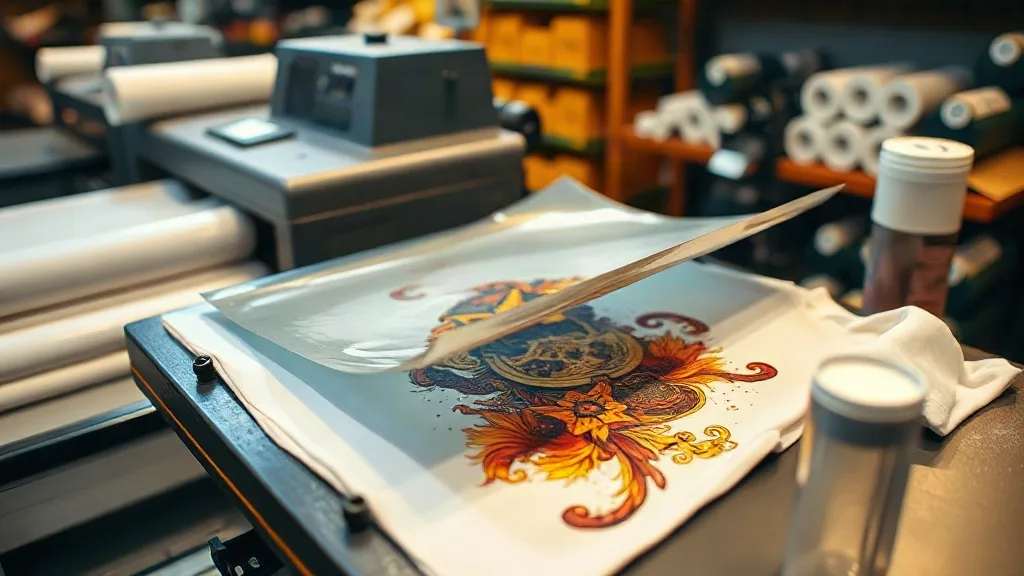
After spending fifteen years wrestling with screens, emulsion, and the endless cycle of reclaiming, I was ready to throw in the squeegee. Then a fellow printer introduced me to dtf transfers. That single conversation changed the trajectory of my shop. If you're a screen printer tired of the same old grind, or a small business owner looking to add custom apparel without the overhead, this is the story of how DTF technology pulled me out of a rut and into a new era of printing.
Why I Took the Leap from Screen Printing to DTF
Screen printing had been good to me. I built a loyal customer base doing team jerseys, band merch, and corporate events. But the margins were shrinking. Every job required a new screen setup, and short runs were killing my profitability. A 12-piece order with three colors meant three screens, three setup fees, and a lot of wasted time. I needed a solution that could handle small batches without the setup hassle, and that's when dtf transfers entered the picture.
DTF, or direct-to-film, isn't just another printing method. It's a completely different workflow. Instead of pushing ink through a mesh screen, you print your design onto a special film, powder it with adhesive, and heat-press it onto the garment. The simplicity is almost deceptive. I was skeptical at first, but after my first test run, I was hooked.
How DTF Transfers Actually Work: A Step-by-Step Breakdown
Understanding the process is key to getting consistent results. Here's what happens from digital file to finished shirt:
- Design Preparation: You create your artwork in any graphic software. The key is to mirror the image before printing, since the film gets flipped during transfer.
- Printing: A DTF printer lays down a layer of white ink, followed by the colored inks. The white layer acts as a base, allowing the colors to pop on any fabric color.
- Powdering: While the ink is still wet, a thermoplastic powder is applied. This powder adheres to the ink and becomes the adhesive that bonds the design to the fabric.
- Curing: The film goes through a heat source, usually a conveyor oven or heat press, to melt the powder and set the ink. This step is critical; undercuring leads to wash-off, overcuring can cause the film to warp.
- Transfer: Once cured, the film is placed on the garment and pressed with a heat press. After cooling, you peel away the film, leaving a vibrant, stretchable design.
The first time I peeled a film and saw the crisp, detailed result, I knew this was a game-changer. No more color separations, no more screen burning. Just a smooth, professional finish.
The Real Cost Breakdown: DTF vs. Screen Printing
Let's talk money. Screen printing has a high setup cost but low per-unit cost for large runs. DTF flips that model. You have minimal setup, but the per-unit cost is higher. However, for short runs, DTF wins hands down. Here's a quick comparison based on my own shop's numbers:
- Screen Printing: $20 per screen setup, plus $0.50 per print for a one-color design on a 50-piece order. Total for 50 shirts: $20 x 1 + $0.50 x 50 = $45, plus garment cost.
- DTF Transfers: $1.50 per transfer (including film and ink), no setup fee. Total for 50 shirts: $1.50 x 50 = $75, plus garment cost.
For 50 pieces, screen printing is cheaper. But for 10 pieces, screen printing would cost $20 + $5 = $25, while DTF would be $15. And for a full-color design, screen printing requires multiple screens, skyrocketing the cost. DTF stays the same regardless of color count. That's where the savings really add up.
Quality That Rivals Traditional Methods
I'll be honest: early DTF prints had a reputation for feeling rubbery and cracking after a few washes. But the technology has evolved. Modern DTF films and powders produce prints that are soft, stretchable, and durable. I've washed test shirts over 50 times, and they still look great. The key is using quality supplies and following the correct temperature and pressure settings.
One of my favorite advantages is the ability to print on a wide range of fabrics. Cotton, polyester, blends, even nylon. Screen printing on polyester can be tricky due to dye migration, but DTF handles it beautifully. I've printed on everything from 100% cotton tees to performance wear, and the results are consistently excellent.
Common Pitfalls and How to Avoid Them
Like any new process, DTF has its quirks. Here are the mistakes I made so you don't have to:
- Not mirroring the image: It sounds obvious, but I can't tell you how many times I forgot to mirror the design and ended up with backwards text. Always double-check before printing.
- Incorrect powder application: Too much powder leads to a rough texture; too little causes poor adhesion. You want an even, light coating. Shake off the excess.
- Inconsistent pressure: Heat press pressure must be firm and even. If it's too light, the transfer won't adhere properly. I recommend a pressure of 4-6 bars.
- Skipping the cooling step: After pressing, let the garment cool completely before peeling. Peeling hot can stretch the design or cause it to lift.
Once you dial in your process, these issues disappear. It's all about repetition and taking notes.
How DTF Transfers Transformed My Business
Within three months of adopting DTF, my shop's revenue increased by 30%. Why? Because I could finally say yes to small orders without losing money. I started offering custom pet portraits, bachelorette party shirts, and even one-off designs for local artists. The flexibility opened up new markets. I also reduced my turnaround time. A job that used to take a week now takes a day.
My customers love the quality. They can't tell the difference between DTF and screen printing, and they appreciate the quick service. I've even started using DTF for sample proofs, which has helped me close more bulk orders.
Is DTF Right for Your Shop?
If you're a screen printer, adding DTF to your arsenal is a no-brainer. It complements screen printing perfectly. Use screen printing for large, simple orders and DTF for complex, short-run jobs. If you're a small business or a crafter, DTF allows you to offer custom apparel without a huge investment. You can start with a basic printer and heat press for under $3,000.
The learning curve is gentle, and the community is supportive. There are countless forums and videos to help you troubleshoot. I wish I had made the switch years ago.
Frequently Asked Questions
What fabrics can I use with DTF transfers?
DTF works on almost any fabric, including cotton, polyester, blends, nylon, and even leather. It's especially good for polyester because it doesn't require special low-bleed inks like screen printing does.
How durable are DTF transfers after washing?
When applied correctly, DTF transfers can last as long as the garment. They withstand dozens of washes without fading, cracking, or peeling. Just wash inside out in cold water and avoid harsh detergents.
Do I need a special printer for DTF?
Yes, you need a DTF printer that uses pigment inks and a white ink channel. You can convert some inkjet printers, but dedicated DTF printers are more reliable. You also need a heat press and a powder shaker or manual powder application.
Can I print DTF transfers at home?
Absolutely. Many home-based businesses use DTF. You'll need a well-ventilated space for curing and a heat press. Start with a small printer and scale up as you grow.
Is DTF more expensive than screen printing?
For large orders, screen printing is cheaper per unit. But for small orders or multi-color designs, DTF is more cost-effective because there are no setup fees. It depends on your volume and design complexity.
Final Thoughts: Embrace the Digital Shift
The printing industry is evolving, and DTF is at the forefront. It's not a fad; it's a proven technology that delivers quality, versatility, and profitability. Whether you're a seasoned screen printer or a newcomer, DTF transfers offer a path to growth. I've seen it firsthand in my own shop, and I'm never looking back. If you're on the fence, I encourage you to try a sample pack. One press, and you'll understand why I made the switch.